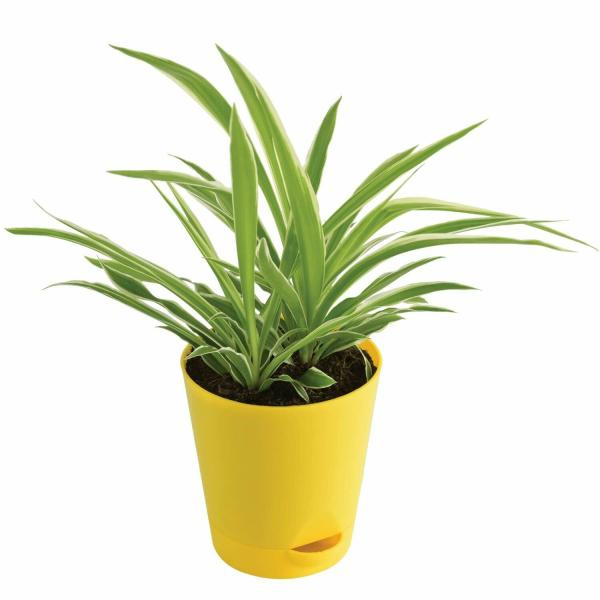
Spider Plants are popular and relatively easy-to-care-for houseplants, known for their arching leaves and “spiderettes” (plantlets) that dangle from the mother plant. Follow these tips to keep your Spider Plant healthy and thriving:
☀️ Sunlight: Spider Plants thrive in bright, indirect sunlight. They tolerate lower light conditions but exhibit their best growth and produce more spiderettes when placed near an east-facing window. A south-facing window with filtered light (e.g., through a sheer curtain) can also work. Avoid exposing them to harsh afternoon sun, especially during summer, as intense direct light can scorch their delicate leaf tips, turning them brown.
💧 Water: Water your Spider Plant when the top inch of soil feels dry to the touch. This typically translates to watering 1-2 times per week during the active growing season (spring and summer) and less frequently in winter when growth slows. Avoid overwatering at all costs, as persistently soggy soil is the primary cause of root rot, which can quickly kill your plant. Ensure the pot has adequate drainage holes.
🪴 Potting Mix: Use a well-draining potting mix that retains some moisture without becoming waterlogged. An ideal mix consists of garden soil, compost, and a good amount of river sand or perlite (about 1 part of each). This combination provides good aeration for healthy root growth while preventing the soil from becoming too dense.
🌱 Fertilizer: Feed your Spider Plant once a month with a diluted liquid fertilizer during the growing season (spring and early monsoon/summer). Look for a balanced fertilizer that provides essential nutrients like Nitrogen (N), Phosphorus (P), and Potassium (K). Avoid fertilizing in winter when the plant’s growth naturally slows down. Over-fertilization can harm the plant, so always dilute according to package instructions.
🌡️ Temperature & Humidity: Spider Plants grow best in cool to average room temperatures, generally between 18-24°C (65-75°F). As they are native to tropical areas, they appreciate moderate to high humidity. If your home’s air is dry, especially in winter due to heating, consider misting your plant occasionally, placing it near a humidifier, or setting its pot on a pebble tray filled with water (ensure the pot isn’t sitting directly in the water).
🐛 Possible Pests & Control: Spider Plants are generally pest-resistant, but they can sometimes attract common houseplant pests like aphids, spider mites, or mealybugs.
🍂 Brown Leaf Tips / 💛 Yellowing Leaves: These are common issues often linked to environmental factors or watering practices.
🥀 Droopy Leaves: Droopy leaves usually signal a watering issue or root stress.
𓇢𓆸 Not Growing / Dying: These are critical signs that your plant needs attention.
🟤 Leaf Spot: Spots on leaves are typically due to fungal infections, often caused by excess moisture on the foliage.
By paying attention to these comprehensive tips, you can help your Spider Plant flourish and produce its characteristic beautiful foliage and charming spiderettes!
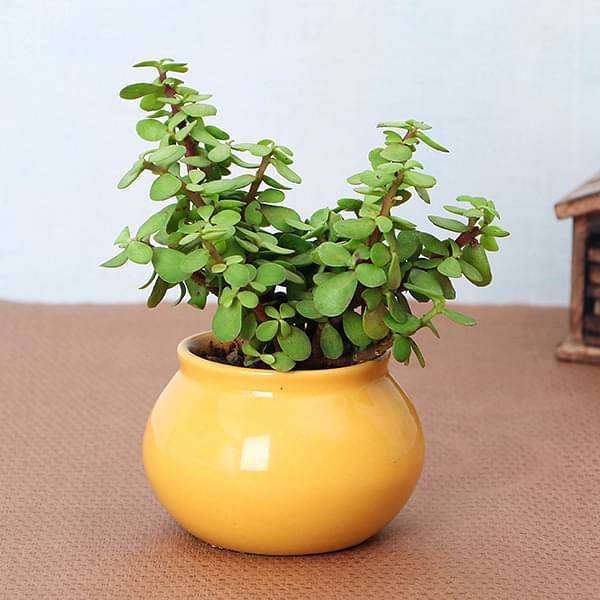
Jade Plant is a popular succulent cherished for its thick, glossy, oval-shaped leaves and tree-like growth habit. With proper care, it can live for many years and even be passed down through generations.
☀️ Sunlight: Jade Plant prefers bright, indirect light and can tolerate some direct morning sun. Placing it on a windowsill with filtered sunlight (e.g., behind a sheer curtain) is ideal to maintain its plump, vibrant, and glossy leaves. For optimal growth, aim for at least 3-4 hours of bright, indirect sunlight daily. A south-facing window is often an excellent spot, providing ample light. Avoid intense afternoon sun, especially in warmer climates, as it can cause sunburn, leading to brown edges or discolored leaves. Rotate your plant regularly to ensure all sides receive adequate light and to prevent uneven growth or sunburn on one side.
💧 Water: The most critical aspect of Jade Plant care is proper watering. Water only when the soil is completely dry to the touch. You can test this by inserting a finger about an inch or two into the soil, or for deeper assessment, use a wooden stick or skewer; if it comes out clean and dry, it’s time to water. Overwatering is the most common problem for Jade Plant, especially during humid monsoons, as it can quickly lead to root rot. In summer, watering once every 7-10 days is usually sufficient, but this can vary depending on temperature and humidity. Reduce watering significantly in winter when the plant is dormant.
🪴 Potting Mix: A cactus or succulent mix is ideal for Jade Plant, as it’s formulated for excellent drainage. Alternatively, you can create your own well-draining mix by combining garden soil with coarse sand, perlite, or crushed brick/grit (about 1 part soil to 1 part perlite/sand/grit). This ensures quick drainage and essential aeration for healthy root growth, preventing waterlogging.
🌱 Fertilizer: Fertilize your Jade Plant sparingly. Feed it once a month during the active growing season (spring and early monsoon/summer) using a balanced liquid fertilizer diluted to half strength. Do not fertilize during the winter months when the plant’s growth slows down significantly. Over-fertilization can burn the roots and harm the plant.
🌡️ Temperature & Humidity: Jade Plant prefers cool to average temperatures, ideally between 13°C – 24°C (55°F – 75°F). They are quite tolerant of dry air and do not require high humidity, making them excellent choices for most indoor environments. However, constant temperature fluctuations can stress the plant. Aim for a relatively stable environment.
🐛 Possible Pests & Control: Jade Plant are generally robust but may occasionally attract common succulent pests such as mealybugs, aphids, or scale insects.
🍂 Brown Leaf Tips / 🔴 Red Leaves / 💛 Yellow Leaves / 🥀 Soft or Droopy Leaves / 🍃 Leaves Falling: These symptoms often overlap and indicate environmental stress or watering issues.
𓇢𓆸 Not Growing / Leaning Plant:
🟤 Leaf Spot:
By understanding these signs and adjusting your care routine accordingly, your Jade Plant will flourish and become a beautiful, long-lasting addition to your home!
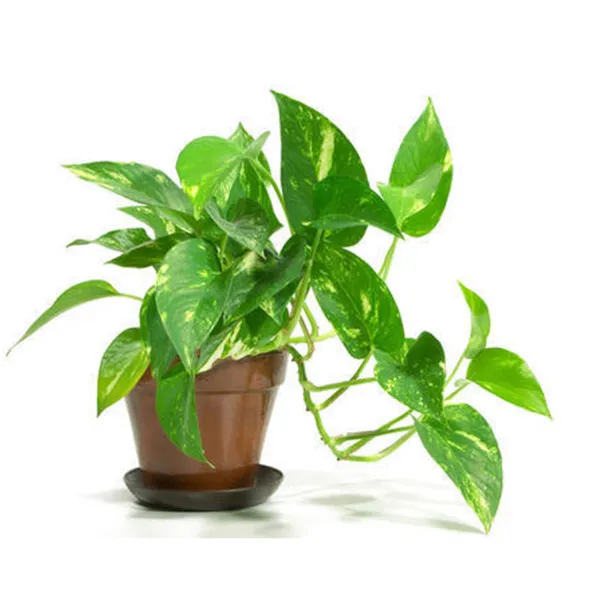
The Money Plant, commonly known as Pothos, is an incredibly popular and easy-to-care-for houseplant known for its cascading vines and heart-shaped leaves. Its resilience and adaptability make it an excellent choice for beginners and a beautiful addition to any indoor space.
☀️ Sunlight: Pothos grows well in low to medium light but flourishes in bright, indirect sunlight. It thrives near a north or east-facing window. Varieties with more variegation (white or yellow patterns) will maintain their coloring better in brighter, indirect light. Avoid placing it in direct afternoon sun, as intense sunlight can bleach or burn the leaves, leading to unsightly brown spots.
💧 Water: Water your Pothos when the top inch of soil dries out. You can check this by inserting your finger into the soil. During summers or warmer periods, this may mean watering once or twice a week, while in winter, it might be reduced to once a week or even less, depending on humidity and temperature. The goal is to keep the soil moist but never soggy. Always ensure that excess water drains out of the bottom of the pot to prevent root rot.
🪴 Potting Mix: Use a well-draining potting mix that allows for good aeration. A good blend consists of garden soil, compost, and cocopeat or coarse sand. Avoid heavy, compact soils that can retain excess water, as this can lead to root problems.
🌱 Fertilizer: Pothos are not heavy feeders. A mild liquid fertilizer every 4–6 weeks during the active growing months (spring and summer) will boost foliage growth. Avoid overfertilizing, especially in winter when the plant’s growth naturally slows down. Over-fertilization can lead to salt buildup in the soil, which can harm the roots and cause brown leaf tips.
🌡️ Temperature & Humidity: Pothos thrives in average room temperatures, typically between 18-35°C (65-95°F). They appreciate average to slightly higher humidity but are quite tolerant of normal household humidity levels. If your home is particularly dry, especially in winter, occasional misting or placing the plant near a humidifier can be beneficial, but it’s generally not a strict requirement.
🐛 Possible Pests & Control: Pothos plants are generally pest-resistant but may occasionally attract mealybugs or scale in areas with low airflow or high humidity.
🍂 Brown Leaf: Brown leaves indicate a watering issue, either too much or too little.
💛 Yellow Leaf: Yellow leaves are a classic sign of overwatering or insufficient light.
🥀 Droopy Leaves / Curling: These symptoms indicate the plant is stressed, most commonly due to watering issues.
𓇢𓆸 Not Growing: Several factors can contribute to stunted growth.
By understanding these signs and adjusting your care routine accordingly, your Pothos (Money Plant) will continue to thrive and bring lush greenery to your home!
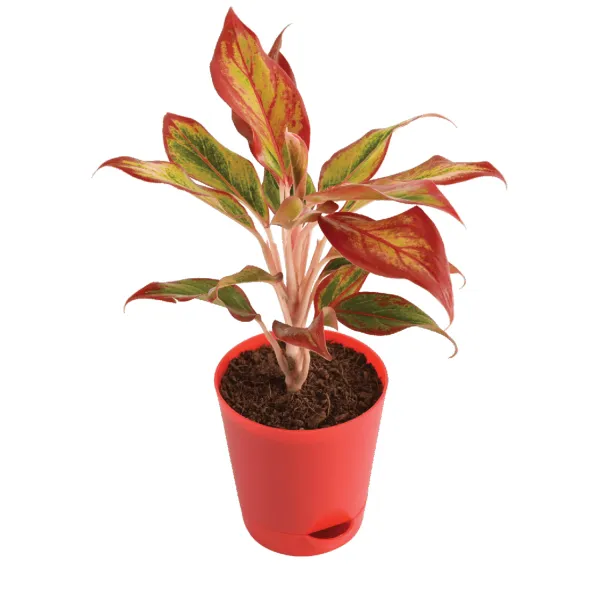
Aglaonema is a popular genus of houseplants prized for their stunning foliage, which comes in a wide array of colors and patterns, from vibrant reds and pinks to classic greens and silvers. These plants are relatively low-maintenance and can adapt to various indoor conditions, making them excellent choices for both beginners and experienced plant enthusiasts.
☀️ Sunlight: Aglaonema plants thrive in bright, indirect light. While they can tolerate lower indoor light conditions, their vibrant coloring, especially the red and pink hues, becomes more vivid and pronounced with brighter, filtered light. Varieties like ‘Snow White’ prefer bright, indirect sunlight or semi-shaded balconies. Avoid exposing any Aglaonema to harsh, direct midday sun, which can scorch the leaves, leading to bleaching (especially for lighter varieties like ‘Snow White’) or brown spots. Bright to medium indirect light is generally suitable.
💧 Water: Water your Aglaonema when the top 25-30% of the soil feels dry to the touch. You can check this by inserting your finger about an inch or two into the soil. Typically, this means watering every 5-7 days in summer and every 10-12 days in winter, depending on your home’s humidity and temperature. Overwatering is a common problem and can quickly lead to root rot. Ensure that water drains completely from the bottom of the pot and avoid letting water sit at the bottom of the pot or in a saucer.
🪴 Potting Mix: Use a well-draining potting mix that retains some moisture without becoming soggy. An ideal mix often consists of garden soil, peat moss or cocopeat, and perlite in equal parts, along with some compost. This blend provides good aeration for healthy roots while ensuring proper drainage.
🌱 Fertilizer: During the active growing season (spring to early monsoon/summer), feed your Aglaonema once a month with a balanced liquid fertilizer diluted to half strength. Varieties with more green foliage may benefit from a slightly more nitrogen-rich fertilizer. You can also give a very small amount of Nitrogen (N), Phosphorus (P), and Potassium (K) (e.g., 3-4 drops of diluted solution) once in a while. Avoid fertilizing in winter or in low light conditions when the plant’s growth naturally slows down. Over-fertilizing can harm the delicate roots.
🌡️ Temperature & Humidity: Aglaonema plants prefer average to warm room temperatures, ideally between 18-29°C (65-85°F). They appreciate moderate to high humidity. If your indoor air is dry, especially in winter, consider placing a bowl of water near the plant, using a pebble tray, or misting the foliage occasionally (though be cautious of leaf spots if water sits on leaves). Protect them from sudden temperature changes, cold drafts, or exposure to cold windows, as temperature stress can cause yellowing or droopiness.
🐛 Possible Pests & Control: Aglaonema plants are generally resilient but can sometimes attract common houseplant pests like spider mites, mealybugs, and aphids.
💛 Yellow Leaves / 🍂 Brown Edges & Black Spots: Yellowing leaves are a common sign that something is amiss.
🥀 Droopy Leaves: Drooping leaves typically indicate a watering or light issue.
🌿 Curling Leaves:
🟤 Leaf Spot:
💡Other Important Tips:
By understanding these signs and adjusting your care routine accordingly, your Aglaonema plant will thrive and continue to display its stunning foliage!
Aralia plants, belonging to the genus Polyscias, are elegant houseplants admired for their unique and diverse foliage, which can range from delicate, feathery leaves to round, glossy ones. They add a sophisticated touch to any indoor space and, with proper care, can thrive for many years.
☀️ Sunlight: Aralia plants prefer bright, indirect light. They can tolerate medium light conditions, but their foliage will be lusher and more vibrant with ample indirect illumination. An east or north-facing window is often ideal. While some varieties can handle a bit of direct morning sun, avoid prolonged exposure to harsh afternoon direct sunlight, as it can scorch their delicate leaves. Insufficient light can lead to leggy growth and less vibrant foliage.
💧 Water: Water your Aralia when the top 1-2 inches of soil feel dry to the touch. They prefer consistently moist soil, but it’s crucial to avoid overwatering and soggy conditions, which can quickly lead to root rot. The frequency of watering will depend on the ambient temperature, humidity, and the size of your pot, typically every 7-14 days. In winter, reduce watering as the plant’s growth slows down. Always ensure that excess water drains out of the bottom of the pot.
🪴 Potting Mix: Use a well-draining, peat-based potting mix that retains some moisture without becoming waterlogged. A mix formulated for houseplants, often containing peat moss, perlite, and pine bark, works well. Good drainage is essential for Aralias to prevent root issues.
🌱 Fertilizer: Feed your Aralia plant with a balanced liquid fertilizer (e.g., 10-10-10 or similar) every 2-4 weeks during the active growing season (spring and summer). Dilute the fertilizer to half strength to avoid over-fertilization. Avoid fertilizing in winter when the plant’s growth naturally slows down. Over-fertilization can lead to salt buildup in the soil, which can harm the roots and cause leaf burn.
🌡️ Temperature & Humidity: Aralia plants thrive in average to warm room temperatures, ideally between 18-29°C (65-85°F). They are sensitive to cold and do not tolerate temperatures below 15°C (60°F) well. Aralias appreciate high humidity, mimicking their natural tropical habitat. If your indoor air is dry, especially in winter, consider misting your plant regularly, placing it on a pebble tray filled with water, or using a humidifier nearby. Protect them from cold drafts or sudden temperature fluctuations.
🐛 Possible Pests & Control:
Aralia plants can be susceptible to common houseplant pests such as spider mites, aphids, mealybugs, and scale insects.
Control: Regularly inspect your plant’s leaves (especially the undersides) for any signs of pests. If pests are detected, you can apply neem oil spray, insecticidal soap, or dab them with a cotton swab dipped in rubbing alcohol. Ensure good air circulation around the plant, as this can help deter spider mites.
💛 Turning Yellow: Yellowing leaves are a key indicator of environmental stress, often related to watering or nutrients.
Overwatering: If you observe yellow leaves accompanied by mushy stems, it’s a strong sign of overwatering leading to root rot. The roots are suffocating and dying.
Solution: Immediately reduce watering frequency. Allow the top soil to dry out more thoroughly between waterings. Ensure proper drainage holes in the pot. If severe, consider repotting into fresh, well-draining soil after inspecting and trimming any rotten roots.
Underwatering: If yellow leaves have dry and crisp edges, it typically indicates underwatering. The plant is not getting enough moisture.
Solution: Adjust your watering routine to water more consistently. When you do water, ensure the entire root ball is saturated.
Nutrient Deficiency: A general yellowing (chlorosis) can also be a sign of a nutrient deficiency.
Solution: Ensure you are using a balanced fertilizer during the growing season as recommended. This provides essential macronutrients (Nitrogen, Phosphorus, Potassium) and micronutrients the plant needs.
Pest Infestation: If yellowing is accompanied by webbing, sticky residue, or visible insects, check if pests like spider mites have infested your plant. These pests feed on plant sap, causing discoloration.
Solution: Apply appropriate pesticides (e.g., neem oil, insecticidal soap) to treat the infestation.
🥀 Droopy Leaves: Drooping leaves usually signal a watering issue or stress.
Underwatering: If the soil is very dry, droopy leaves are a clear sign the plant is thirsty.
Solution: Water thoroughly. The leaves should perk up within a few hours.
Overwatering/Root Rot: Similar to yellowing, severe overwatering leading to root rot can also cause droopy leaves as the damaged roots cannot supply water to the foliage.
Solution: Check soil moisture and follow steps for overwatering/root rot if suspected.
Temperature Stress: Sudden drops in temperature or cold drafts can cause leaves to droop.
Solution: Protect your plant from cold exposure.
🍂 Brown Leaf Tips/Edges: Brown leaf tips or edges are common and often related to environmental factors.
Low Humidity: Aralias prefer high humidity. Dry indoor air is a common cause of brown tips.
Solution: Increase humidity around the plant by misting, using a pebble tray, or a humidifier.
Water Quality: Chemicals (like chlorine or fluoride) in tap water or excessive salt buildup can also lead to brown tips.
Solution: Occasionally flush the soil with distilled or filtered water.
Inconsistent Watering: Periods of extreme dryness followed by drenching can stress the plant and result in brown tips.
Solution: Maintain a consistent watering schedule.
🟤 Leaf Spot:
💀 Dying: If any of the above-mentioned problems (severe overwatering leading to root rot, prolonged underwatering, severe pest infestations, or extreme temperature stress) are not treated promptly and effectively, those may kill the plants. Regular observation and quick intervention are key to an Aralia’s survival.
By understanding these signs and adjusting your care routine accordingly, your Aralia Plant will remain a beautiful and thriving specimen in your home!
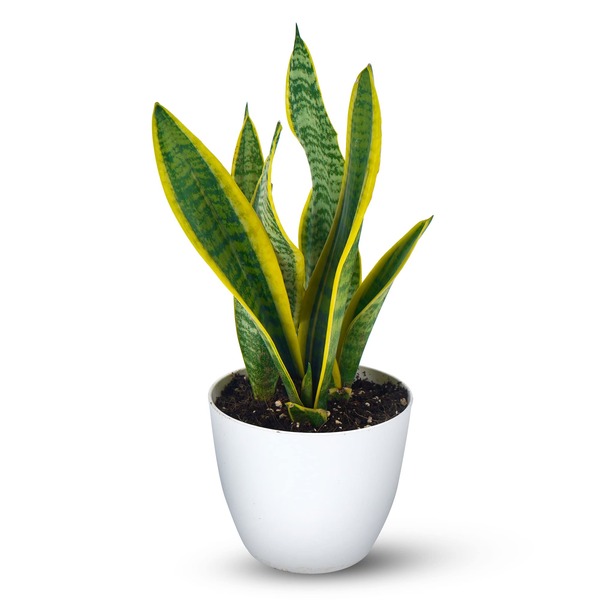
The Snake Plant, also known as Mother-in-Law’s Tongue, is a popular and remarkably resilient houseplant. It’s famous for its upright, sword-like leaves and ability to tolerate a wide range of conditions, making it an excellent choice for beginners and busy plant parents.
☀️ Sunlight: Snake Plants are highly adaptable and can tolerate various light levels, from low light to bright, indirect light. For optimal growth and to encourage vibrant leaf patterns, provide bright, indirect sunlight. They can handle some direct morning sun, but avoid prolonged exposure to harsh afternoon sun, which can scorch the leaves. While they survive in low light, growth will be slower and variegation may be less pronounced.
💧 Water: Underwatering is always better than overwatering for Snake Plants. Allow the soil to dry out completely between waterings. This usually means watering every 2-4 weeks, depending on the season, humidity, and light conditions. In winter, when the plant is dormant, watering can be reduced to once a month or even less. Overwatering is the leading cause of problems for Snake Plants, often leading to root rot. When watering, ensure water drains out of the bottom of the pot.
🪴 Potting Mix: Use a well-draining potting mix to prevent waterlogging. A cactus or succulent mix is ideal. If using a standard potting mix, amend it with perlite, coarse sand, or crushed brick/grit to improve drainage and aeration. Good drainage is crucial for healthy root development and to prevent root rot.
🌱 Fertilizer: Snake Plants are not heavy feeders. Fertilize sparingly, if at all. During the growing season (spring and summer), you can feed them once a month with a balanced liquid fertilizer diluted to half strength. Avoid fertilizing in winter when the plant’s growth slows down. Over-fertilization can lead to a buildup of salts in the soil, which can harm the roots.
🌡️ Temperature & Humidity: Snake Plants thrive in average room temperatures, ideally between 18°C – 35°C (65°F – 95°F). They are quite tolerant of dry air and do not require high humidity, making them well-suited for most indoor environments. Protect them from sudden drops in temperature or cold drafts, especially during winter.
🐛 Possible Pests & Control: Snake Plants are generally pest-resistant. However, occasionally they might encounter mealybugs or spider mites.
𓇢𓆸 Not Growing:
🍂 Brown Leaf / 💛 Turning Yellow: These are common indicators of stress, often related to watering or light.
🟫 Rotting / 🥀 Droopy Leaves: These are critical signs, most often due to overwatering.
🌿 Leaf Curling:
By understanding these signs and adjusting your care routine accordingly, your Snake Plant will remain a resilient and attractive feature in your home!
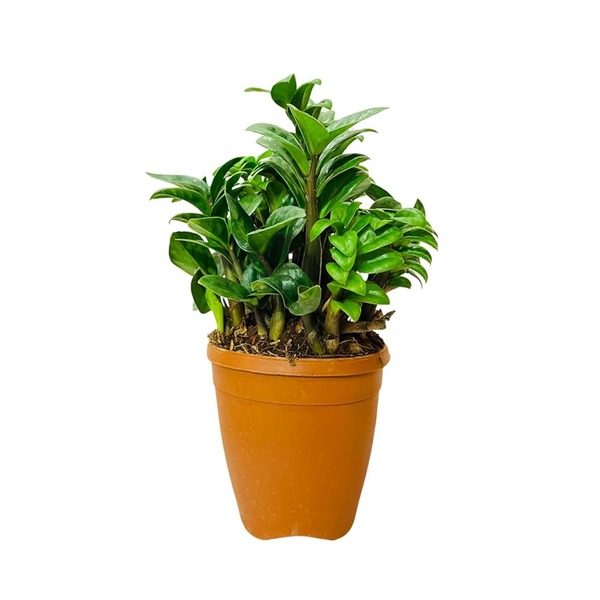
The ZZ Plant, or Zamioculcas zamiifolia, also known as Zanzibar Gem, is a highly popular houseplant renowned for its remarkable resilience and striking, waxy, dark green leaves. Its ability to tolerate neglect and thrive in a wide range of conditions makes it an ideal choice for beginners, busy individuals, and those looking for a low-maintenance yet elegant plant.
☀️ Sunlight: ZZ Plants are incredibly tolerant of low light conditions, which is one of their most appealing features. They can survive in very dim rooms, making them perfect for offices or north-facing rooms. However, they will thrive and exhibit better growth in bright, indirect light. While they can adapt to slightly brighter conditions, avoid prolonged direct sunlight, as it can scorch their leaves. Generally, this plant can tolerate low light, but it does require minimum light; if the plant is getting no light at all, then it may struggle and turn yellow.
💧 Water: This is the most crucial aspect of ZZ Plant care. ZZ Plants are highly susceptible to overwatering due to their rhizomatous roots that store water. Allow the soil to dry out completely between waterings. You can check this by inserting your finger or a stick into the soil to about 2 inches (5 cm); do not water if the soil is soggy. In most indoor environments, this means watering every 2-4 weeks, or even less frequently in winter (once a month or less). When you do water, ensure thorough drainage from the bottom of the pot.
🪴 Potting Mix: Use a well-draining potting mix that prevents water from sitting around the roots. A cactus or succulent mix is ideal. If using a standard potting mix, amend it with perlite, coarse sand, or pumice to improve drainage and aeration. Good drainage is paramount for preventing root rot in ZZ Plants.
🌱 Fertilizer: ZZ Plants are very light feeders and do not require frequent fertilization. You can add a balanced liquid fertilizer once a month during the growing season (spring and summer), diluted to half or quarter strength. Avoid fertilizing in winter when the plant is dormant. Over-fertilization can lead to a buildup of salts in the soil, which can damage the plant.
🌡️ Temperature & Humidity: ZZ Plants prefer average room temperatures, ideally between 18-29°C (65-85°F). They are quite tolerant of dry indoor air and do not require high humidity, making them well-suited for most homes and offices. Protect them from cold drafts or temperatures below 10°C (50°F), as they are sensitive to cold.
🐛 Possible Pests & Control: ZZ Plants are remarkably pest-resistant, making them even easier to care for. Occasionally, they might attract mealybugs or scale, especially if the plant is stressed or kept in a very humid, poorly ventilated environment.
💛 Turning Yellow: Yellowing leaves are almost always a sign of a watering or light issue.
🥀 Droopy Leaf: Droopy leaves usually indicate a watering issue.
𓇢𓆸 Not Growing: If your ZZ Plant isn’t putting out new growth, consider these factors –
🟫 Rotting (Often Indicated by Yellowing/Mushy Leaves): Rotting is almost exclusively due to overwatering.
By understanding these signs and adjusting your care routine accordingly, your ZZ Plant will continue to be a robust, low-maintenance, and attractive presence in your home!
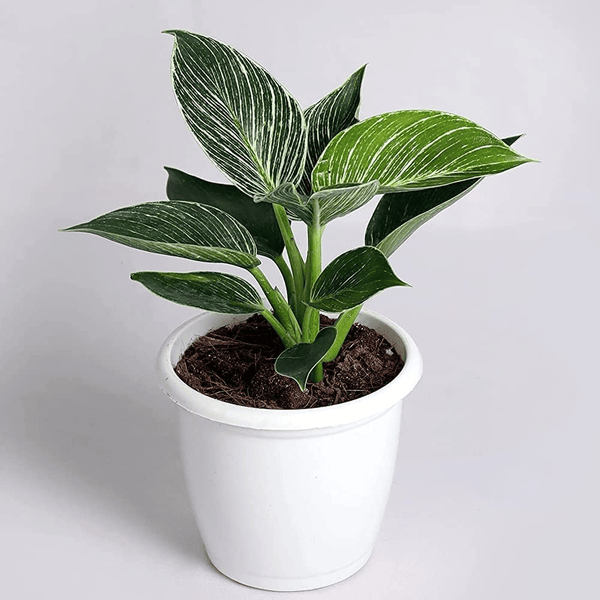
The Philodendron Birkin is a stunning and popular houseplant known for its distinctive dark green leaves dramatically streaked with creamy white or yellow variegation. Its elegant appearance and relatively straightforward care make it a favorite among plant enthusiasts.
☀️ Sunlight: Philodendron Birkin thrives in bright, indirect light. This type of lighting is crucial for maintaining its striking variegation. Placing it near an east or north-facing window, or a few feet away from a south or west-facing window with a sheer curtain, is ideal. Avoid direct sunlight, especially intense afternoon sun, as it can scorch the delicate variegated parts of the leaves, leading to brown spots or fading. Insufficient light, on the other hand, can cause the variegation to fade, leading to leaves becoming all green.
💧 Water: Water your Philodendron Birkin when the top 2 inches (5 cm) of soil feel dry to the touch. It prefers consistently moist soil but absolutely detests soggy conditions. Overwatering is a common problem, often leading to root rot. If the soil remains wet for too long, you might notice leaves turning yellow and eventually drying or falling. Always ensure that the pot has good drainage holes and that excess water drains away completely. Reduce watering frequency in winter when the plant’s growth slows down.
🪴 Potting Mix: Use a well-draining, airy potting mix that retains some moisture without becoming waterlogged. A mix formulated for aroids, typically containing ingredients like peat moss, perlite, coco coir, and some orchid bark or charcoal, works well. This type of mix provides good aeration for the roots and prevents compaction.
🌱 Fertilizer: During the active growing season (spring and summer), feed your Philodendron Birkin once a month with a balanced liquid fertilizer diluted to half strength. This will support its vigorous growth and help maintain its vibrant variegation. Avoid fertilizing in winter when the plant’s growth is dormant. Over-fertilization can lead to salt buildup in the soil, which can burn the roots and manifest as brown leaf tips.
🌡️ Temperature & Humidity: Philodendron Birkin prefers average to warm room temperatures, ideally between 18-29°C (65-85°F). Protect it from cold drafts and temperatures below 15°C (60°F), as it is sensitive to cold. This plant thrives in high humidity, mimicking its natural tropical environment. Insufficient humidity can lead to brown leaves or crispy edges. To increase humidity, mist the leaves every other day, use a pebble tray with water, or place the plant near a humidifier.
🐛 Possible Pests & Control: Philodendron Birkin can occasionally attract common houseplant pests such as spider mites, mealybugs, and aphids.
Spider Mites: Small dots on the leaves, often accompanied by fine webbing on the undersides, indicate a spider mite infestation.
Control: Regularly clean leaves with a damp cloth to remove dust and deter pests. Ensure sufficient humidity and good airflow, as spider mites thrive in dry conditions. For infestations, use an insecticide or miticide spray, or neem oil. Apply according to product instructions and repeat as necessary.
🍂 Brown Leaves / Drying, Yellowing, or Falling Leaves: These symptoms often point to issues with watering or humidity.
Insufficient Humidity: Brown leaves, especially crisp edges or tips, indicate insufficient humidity.
Solution: Increase humidity around the plant. Mist the leaves every other day, use a pebble tray, or a humidifier.
Overwatering: Drying, yellowing, or falling leaves are a classic sign of overwatering. The roots are likely struggling or rotting due to too much moisture.
Solution: Allow the top 2 inches (5 cm) of soil to dry before re-watering. Ensure the pot has adequate drainage. If severe, consider repotting into fresh, dry soil after checking for and trimming any rotten roots.
Underwatering: While less common than overwatering, prolonged drought can also cause leaves to turn brown and crispy.
Solution: Ensure consistent watering when the top few inches of soil are dry.
🌿 Leaves Become All Green / No Variegations: This indicates that the plant is not receiving enough light to maintain its beautiful variegation.
Unstable Variegation: The Birkin variegation is inherently somewhat unstable and can revert.
Insufficient Sunlight: The most common reason for leaves becoming all green or losing their variegation is insufficient light. The plant produces more chlorophyll to compensate for low light.
Solution: Ensure the plant receives sufficient bright, indirect sunlight. Move it to a brighter location, but avoid direct sun which can cause burns.
Humidity: While light is primary, ensuring sufficient humidity also contributes to overall plant health, which can support variegation.
🦠 Weird Lesions and Odor: These symptoms are severe and suggest a bacterial or fungal disease.
By understanding these signs and adjusting your care routine accordingly, your Philodendron Birkin will continue to display its unique and beautiful foliage!
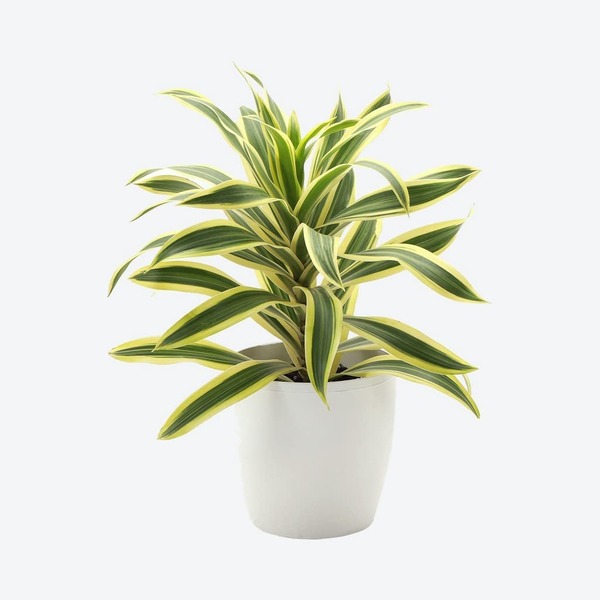
The Song of India (Dracaena Reflexa) is a popular and striking houseplant, admired for its vibrant green and yellow variegated leaves that spiral around its woody stems. Its exotic appearance and relatively easy care make it a great choice for adding a tropical touch to indoor spaces.
☀️ Sunlight: The Song of India plant prefers bright, indirect light. Place the plant where it receives ample bright light throughout the day, but not direct, intense sunlight all day, especially harsh afternoon sun. Too much direct sun can scorch the leaves, leading to faded colors or brown spots. While it can tolerate lower light levels, its variegation will be less vibrant, and growth may slow down.
💧 Water: Water your Song of India when the top 1-2 inches of soil feel dry to the touch. It’s crucial to avoid both overly wet and very dry soil. Before watering, check the soil moisture by inserting your finger into the pot. While consistency is good, avoid rigid schedules and always let the topsoil dry out. Avoid waterlogged soil at all costs, as this is a primary cause of root rot. In the evening, if the soil is dry, you can water, adjusting the frequency to your local climate and humidity levels.
🪴 Potting Mix: Use a well-draining potting mix that allows for good aeration. A standard houseplant mix amended with perlite, sand, or a bit of coarse bark is ideal to ensure proper drainage and prevent water from sitting around the roots.
🌱 Fertilizer: During the active growing season (spring and summer), feed your Song of India plant with a balanced liquid fertilizer diluted to half strength, typically once every 2-4 weeks. Avoid fertilizing in winter when the plant’s growth is dormant. Over-fertilization can lead to salt buildup in the soil, which can contribute to brown leaf tips.
🌡️ Temperature & Humidity: Song of India plants prefer average to warm room temperatures, ideally between 18-29°C (65-85°F). They are sensitive to cold and should be protected from temperatures below 15°C (60°F) and cold drafts. These plants appreciate moderate to high humidity. If your indoor air is dry, especially during winter, consider misting the leaves regularly, using a pebble tray with water, or placing a humidifier nearby to prevent brown leaf edges.
🐛 Possible Pests & Control: Song of India plants can occasionally be affected by common houseplant pests such as spider mites, mealybugs, and scale insects.
Control: Regularly inspect your plant for any signs of pests. If detected, wipe leaves clean with a damp cloth. For infestations, use neem oil spray or insecticidal soap, following product instructions. Good air circulation can also help deter pests.
🍂 Brown Leaf Edges or Tips (Necrosis): Brown leaf edges or tips are a common issue, scientifically known as necrosis, and indicate stress or sickness in the plant.
Instant Solution (Trimming): Brown leaf edges are irreversible, so it is recommended to trim the brown portions using sanitized scissors while maintaining the natural leaf shape. If half or most of a leaf turns brown or yellow, it’s better to remove the entire leaf at its base. Trimming can be applied to yellow, brown, or black leaf edges any time of the year with clean, sharp tools.
Reasons for Brown Leaf Edges (Identifying the Cause): Trimming is not a permanent solution, as brown leaves indicate an underlying problem. We need to identify the specific factor causing the problem to provide proper care. Common causes include:
Watering Problem:
Too Much Water: Can lead to root rot, which indirectly causes brown tips as the roots can’t absorb water.
Too Little Water: Consistent underwatering or allowing the soil to dry out excessively between waterings can also stress the plant, leading to brown tips.
Low Humidity: High humidity (or rather, sudden drops to low humidity) is a significant factor. If the air is too dry, the leaf tips will turn brown.
High Heat: Excessive heat can also contribute to leaf browning.
Mineral Buildup in Water: Some plants, including Dracaenas, are sensitive to minerals like fluorine, chlorine, and sodium salts found in tap water, which can accumulate in the soil and cause brown leaf tips.
Solution: Consider using filtered water, distilled water, or rainwater, or letting tap water sit out overnight to allow chlorine to dissipate. Occasionally flush the soil thoroughly to prevent salt buildup.
Lack of Nutrients: While less common than watering issues, prolonged nutrient deficiency can weaken the plant and make it susceptible to stress-related browning.
Pest Infestations: Certain pests can also cause damage that manifests as brown spots or tips.
💛 Turning Yellow: Yellowing leaves are usually a sign of overwatering or other environmental stress.
Overwatering: Yellow leaves along with mushy stems are a strong indicator of overwatering leading to root rot.
Solution: Immediately reduce watering frequency. Ensure the soil drains efficiently and is never waterlogged.
Underwatering: Yellow leaves with dry and crisp edges (often accompanied by browning) indicate underwatering.
Solution: Increase watering frequency slightly, ensuring the soil gets thoroughly moistened when watered.
Nutrient Imbalance: A general yellowing can sometimes point to a nutrient imbalance or deficiency.
Solution: Consider using a balanced fertilizer during the growing season as recommended.
Normal Aging: It’s normal for older, lower leaves to gradually turn yellow and drop off as the plant matures.
🌿 Removing Unwanted Growth / Soil Management:
Removing Unwanted Growth: Regularly remove any unwanted growth in the pot (like weeds or suckers) that might hinder soil aeration or compete for nutrient absorption, ensuring the plant’s resources are directed to healthy growth.
Soil Management: Check the soil moisture regularly. If it’s dry, you can water, adjusting to your local climate. Avoid waterlogged soil at all costs.
🌱 Avoid Frequent Repotting:
🦠 Fungicide or Turmeric Application:
Solution: Spray a fungicide specifically designed for houseplants according to product instructions, or as a natural alternative, you can add a small amount of turmeric to the soil, as it has antifungal properties. Ensure good air circulation.
💀 Dying:
By understanding these signs and adjusting your care routine accordingly, your Song of India plant will remain a beautiful and vibrant centerpiece in your home!
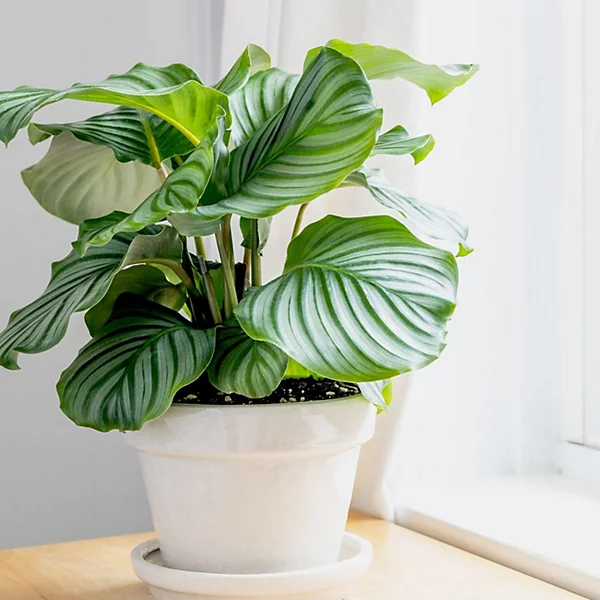
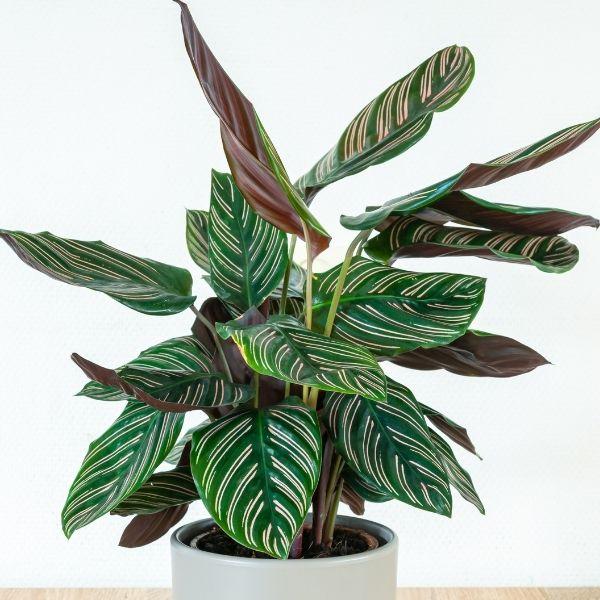
Calathea plants are highly sought after for their stunningly vibrant and uniquely patterned foliage, which comes in a wide array of colors, stripes, and spots. Known for their “prayer plant” habit of raising and lowering their leaves throughout the day, Calatheas are exquisite but considered high-maintenance and not recommended for beginners. They rarely flower indoors, so their beauty primarily lies in their captivating leaves.
🌿 Before You Buy / Initial Care: When purchasing a Calathea, ensure the leaves are free of black spots, brown edges, yellowing, or any signs of spider mites. Protect the plant from cold temperatures (below 16°C or 60°F) when transporting it home, as they are very sensitive to cold.
☀️ Sunlight: Calatheas thrive in medium to bright indirect sunlight. Direct sunlight, especially harsh afternoon sun, can easily damage their delicate leaves, causing them to fade, scorch, or lose their vibrant patterns. A north-facing window is ideal in the northern hemisphere (like Howrah, West Bengal). If placing in east or west-facing windows, ensure direct sun exposure is limited, perhaps by using a sheer curtain. For south-facing windows, move the plant deeper into the room to filter the light. More indirect light generally promotes faster and healthier growth.
💧 Water: Calatheas need consistently moist soil but should never sit in water. Water when the top 2.5 cm (1 inch) of soil feels dry to the touch. In winter, as the plant goes dormant, allow the soil to dry out a bit more, up to 5 cm (2 inches) deep, before re-watering. Always ensure excellent drainage from the bottom of the pot. Self-watering systems can be an excellent way to provide consistent moisture without the risk of overwatering.
🪴 Potting Mix: A well-draining mix is crucial for Calatheas. A recommended blend is 80% standard planting soil and 20% perlite or pumice for good drainage and aeration. Planting in pure pumice is also an option, provided it’s mixed with something that has good cation exchange capacity, like vermiculite or clay, to retain some nutrients.
🌱 Fertilizer: Calatheas require consistent fertilization during their active growing period (typically March to October in the northern hemisphere). Follow the fertilizer instructions, applying a balanced liquid fertilizer typically every one to two weeks. Nutrient deficiency can cause leaf colors to fade.
🌡️ Temperature & Humidity: Calatheas are highly sensitive to their environment.
Temperature: They thrive in temperatures between 22°C−24°C (72°F−75°F). Protect them from cold temperatures (below 16°C or 60°F), cold windows, and drafts, as these can severely damage the leaves. Avoid placing them near hot radiators.
Humidity: High humidity is crucial for Calatheas, with at least 40% humidity, preferably 50% or higher. Low humidity (below 40%) is a primary cause of brown tips, brown edges, and curling leaves.
Ways to Increase Humidity: Use a humidifier, group plants together (creating a microclimate), or place the pot on a saucer with gravel and water (ensuring the pot isn’t sitting directly in the water). Misting to increase humidity is only effective if done daily; infrequent misting can cause damage due to fluctuating humidity levels.
🐛 Possible Pests & Control: Calatheas are prone to pests, especially spider mites, often when the plant is stressed (e.g., by low humidity).
✂️ Pruning: As Calatheas grow wider rather than taller, wide leaves can be pruned off at the base. Newer leaves that are making the plant wider can also be cut at the soil base to control size and slow growth without harming the plant. Use clean, sharp tools for pruning.
🪴 Repotting: It’s recommended to wait at least one year before repotting a newly acquired Calathea, allowing the plant to adjust to its new environment. After that, repotting every two to three years is ideal. To control the plant’s size, move up only one or two pot sizes at a time, as larger pots can retain too much water, increasing the risk of overwatering.
🌱 Propagation: Propagate Calatheas by separating rhizomes (their thick, nutrient-storing underground stems). Ensure each new division has these rhizomes to draw energy from.
⚠️ Toxicity: Calatheas are non-poisonous to humans and pets, making them a safe choice for homes with children and animals.
💛 Yellowing Leaves / Black Spots / Dying Leaves: These are critical signs, often pointing to watering issues or disease.
Solution: Reduce watering frequency drastically. Allow the top soil to dry adequately. If root rot occurs, repot the plant into fresh, well-draining soil. Before repotting, remove any affected roots that are smelly, black, or mushy.
🥀 Droopy Leaves / Wilting / Curling Leaves: These symptoms indicate the plant is stressed, often by incorrect watering or humidity.
Underwatering: If the soil is excessively dry, the plant will wilt or leaves will hang down, especially at night when they should typically be moving upwards. Prolonged underwatering also leads to brown tips and edges, which are permanent.
Solution: Increase watering frequency slightly, ensuring the soil gets thoroughly moistened when watered. Trim off the permanent brown tips and edges with clean scissors to improve appearance.
Low Humidity: Curling leaves can indicate either low humidity or insufficient water. If the soil moisture is adequate, low humidity is the likely culprit.
Solution: Increase humidity around the plant using a humidifier, pebble tray, or grouping plants. Remember, consistent daily misting is needed if using that method.
By understanding these signs and providing the specific care a Calathea demands, you can help this beautiful plant thrive and continuously display its stunning foliage!
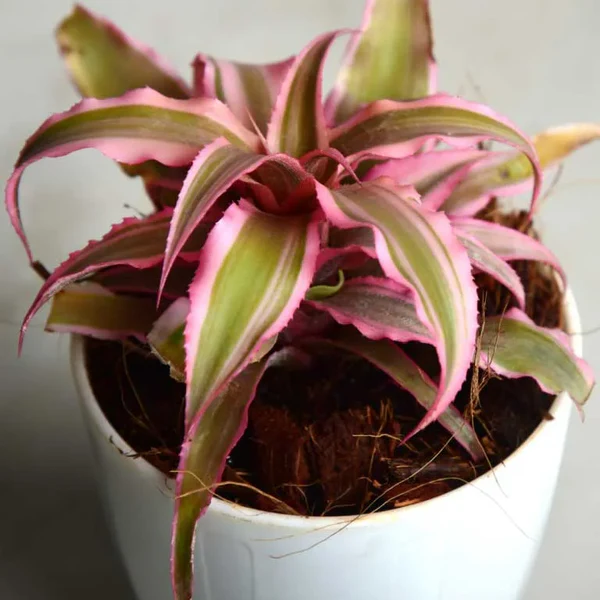
Cryptanthus, commonly known as Earth Stars, are fascinating terrestrial bromeliads renowned for their vibrant, star-shaped rosettes of foliage. Their intricate patterns and wide range of colors make them a unique and captivating addition to any plant collection.
🌸 Blooming and Propagation: Cryptanthus plants are monocarpic, meaning they bloom only once in their lifetime. After their bloom cycle, they begin to produce “pups” or baby plants. Cryptanthus are prolific propagators and can produce a significant number of pups from various parts of the plant, offering options to either divide them into individual plants or keep them together for a fuller, clumped display.
☀️ Sunlight: Cryptanthus thrive in conditions similar to their rainforest origins, preferring indirect, dappled, or moderate light. They can tolerate a range of light conditions, from shadier spots up to brighter, filtered light. Avoid intense, direct sunlight, which can scorch their leaves and fade their vibrant colors.
💧 Water: These plants prefer to stay evenly moist, avoiding both waterlogging and becoming bone dry. Check the soil moisture before watering. Watering once or twice a week is generally sufficient, but this can vary based on your environment’s temperature and humidity. Always ensure that excess water drains out of the bottom of the pot.
🪴 Potting Mix: As terrestrial bromeliads, Cryptanthus need a very light, airy soil with excellent drainage to prevent rotting. A mix designed for bromeliads or orchids, or a custom blend of standard potting mix with plenty of perlite, coarse sand, or orchid bark, would be ideal.
🌱 Fertilizer: Cryptanthus are not particularly demanding when it comes to fertilizer. You can use general houseplant fertilizers, orchid fertilizers, or slow-release options during their active growing season (spring and summer). However, it’s crucial to avoid over-fertilizing, as this can harm the plant. Always dilute liquid fertilizers to half or quarter strength.
🌡️ Temperature & Humidity: These plants are quite tolerant of various temperatures, even some colder weather as long as it doesn’t freeze. However, they flourish best between 18°C−27°C (65°F−80°F). High humidity is crucial for Cryptanthus. If kept indoors, avoid drafty areas or placing them near heating/cooling vents that can rapidly dry out the plant. Misting with a spray bottle can help keep their foliage refreshed and boost humidity.
🐛 Possible Pests & Control: Cryptanthus are generally robust against pests, but like many houseplants, they can occasionally encounter common issues like mealybugs or scale.
🪴 Other Important Tips:
Removing Unwanted Growth: Ensure there’s no unwanted growth in the pot that might hinder soil aeration or nutrient absorption for your Cryptanthus.
Avoid Frequent Repotting: Similar to many plants, frequently changing the plant’s pot can stress it and potentially stunt its growth. Repot only when necessary, such as when the plant has outgrown its container or you are propagating pups.
🍂 Brown or Crispy Leaf Tips/Edges / Faded Color: These often indicate environmental stress.
Low Humidity: A common cause of crispy tips/edges.
Solution: Increase humidity by misting regularly, using a pebble tray, or placing a humidifier nearby.
Too Much Direct Sun: Intense light can scorch leaves and cause colors to fade.
Solution: Move the plant to a location with bright, indirect, or dappled light.
Underwatering: If the soil is consistently too dry, the plant may show signs of dehydration.
Solution: Ensure the plant is watered evenly when the topsoil starts to dry, avoiding it becoming bone dry.
💛 Yellowing Leaves / Mushy Base: These are critical signs, typically pointing to overwatering or root rot.
Solution: Allow the soil to dry out more between waterings. Ensure the potting mix is very airy and drains exceptionally well. If root rot is suspected, gently unpot, inspect roots, remove any mushy parts, and repot into fresh, dry, well-draining soil.
🌱 Stunted Growth / No New Pups:
Insufficient Light: While tolerant of lower light, too little light can slow down growth and pup production.
Solution: Move the plant to a brighter spot with indirect light.
Nutrient Deficiency: Although not heavy feeders, a lack of essential nutrients can affect overall vigor.
Solution: Ensure you are fertilizing sparingly during the growing season with a balanced, diluted fertilizer.
Root Issues: Poor root health due to compacted soil or root rot can prevent growth.
Solution: Check soil, ensure good drainage, and repot if necessary.
🟤 Leaf Spot / Rotting Base (Fungal):
Solution: Ensure excellent air circulation. Avoid waterlogging. If signs of a fungal attack are present (like unusual spots or rotting), spray a fungicide or add a small amount of turmeric to the soil.
By understanding these needs and providing appropriate care, your Cryptanthus will continue to display its unique beauty and even provide you with new “earth stars” to enjoy!
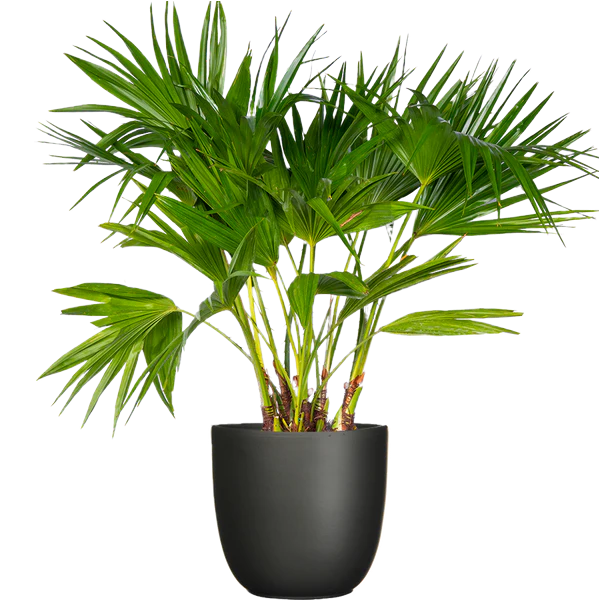
The China Palm or Chinese Fan Palm (Livistona Chinensis), is a graceful and popular indoor plant known for its large, fan-shaped, glossy green leaves that give it a distinctive tropical appeal. Its relatively easy care and impressive stature make it a wonderful addition to homes and offices.
☀️ Sunlight: The China Palm thrives in indirect sunlight for about 5 hours a day. It can tolerate some direct morning or evening sun, which can be beneficial. However, it’s advised to avoid excessive direct sunlight, especially in the afternoon, as intense rays can cause leaf burn and discoloration, appearing as scorched or bleached spots. A bright spot near an east-facing window or a few feet from a south or west-facing window is often ideal.
💧 Water: The Chinese Fan Palm prefers drier conditions rather than consistently wet soil. It’s recommended to water only when the top inch of the soil is dry to the touch. You can check this by inserting your finger into the soil. Overwatering is a common problem and can lead to dry leaf tips (paradoxically, as it signifies root stress). Conversely, underwatering can cause older leaves to turn yellow. Always ensure the pot has excellent drainage holes to prevent waterlogging.
🪴 Potting: It’s important to use a large pot (at least 14 inches in diameter) because the plant’s roots expand quickly. Using a larger pot from the start reduces the need for frequent repotting, allowing the plant to settle and grow for about three years before needing another size up.
🥣 Soil Mix: A well-draining soil mix is crucial for healthy root expansion and to prevent water retention issues. A recommended mix includes:
40% garden soil
25% sand
35% vermicompost
Optional additions like perlite or dried leaves can further enhance drainage and aeration, contributing to strong root growth.
🌱 Fertilizing: Regular fertilization is suggested to keep the plant healthy and prevent leaf discoloration. Feed your China Palm with a balanced liquid fertilizer every one to two months during its active growing season (typically spring and summer). Reduce or cease fertilization during the cooler, dormant months of autumn and winter.
🌡️ Temperature & Humidity: China Palms prefer average to warm room temperatures, ideally between 18°C−29°C (65°F−85°F). They are generally tolerant of average household humidity but appreciate higher humidity, especially in very dry environments. If your home is dry, occasional misting can be beneficial, but focus more on proper watering and light. Protect them from cold drafts.
🐛 Pest and Disease Management: The China Palm can be susceptible to fungal attacks, especially with too much direct sun or persistently dry conditions (which stress the plant). These can lead to leaf spots or red dots on the foliage.
🍂 Brown Leaf Burn / Discoloration:
Cause: Excessive direct sunlight, especially in the afternoon, is the primary reason for leaf burn and discoloration, appearing as bleached or scorched spots.
Solution: Move the plant to a location where it receives bright, indirect light, or morning/evening direct sun, avoiding intense midday sun.
🍂 Dry Leaf Tips:
Solution: Allow the top inch of soil to dry out completely before watering again. Ensure excellent drainage.
💛 Yellow Older Leaves:
Cause: Underwatering can cause older leaves to turn yellow as the plant sheds foliage to conserve moisture.
Solution: Adjust your watering routine to ensure the plant receives adequate water when the top inch of soil is dry.
Normal Aging: It’s also natural for the oldest, lowest leaves to yellow and eventually die off as part of the plant’s life cycle. You can trim these away.
🟤 Leaf Spots / Red Dots:
Solution: Ensure proper lighting and watering. Apply a fungicide every one to two months as a preventive or treatment measure.
By understanding these needs and providing appropriate care, your China Palm will remain a majestic and healthy addition to your indoor environment!
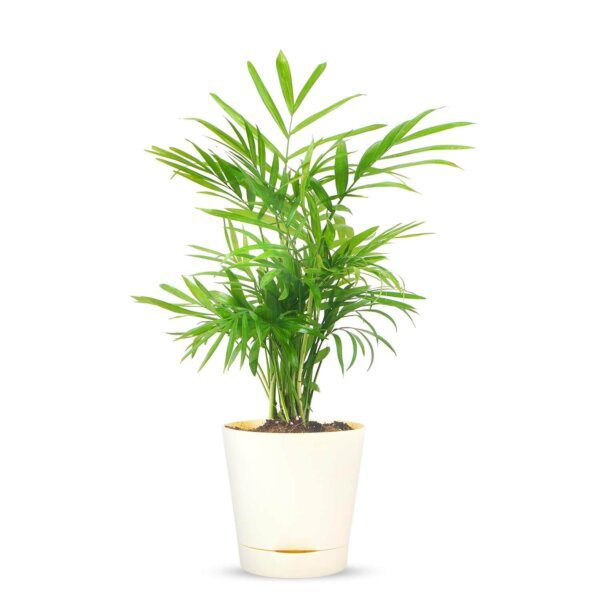
The Areca Palm (Dypsis Lutescens), also known as the Butterfly Palm, is a popular and elegant houseplant renowned for its lush, feathery fronds that bring a tropical ambiance to any indoor space. It’s also celebrated for its air-purifying qualities, though it requires specific care to thrive.
☀️ Sunlight: Areca Palms need medium light. While they can tolerate some direct sunlight, diffused light is preferable for a luscious green appearance and to prevent leaf burn. An east-facing window or a spot a few feet away from a south or west-facing window is often ideal. Too much intense, direct sun can cause the leaves to look bleached or scorched.
💧 Water: Water the Areca Palm when the topsoil looks dry to the touch. It’s crucial to find a balance between overwatering and underwatering.
Water Quality: Hard water or fluoride in water can cause the plant to look burnt. If possible, use filtered water, rainwater, or distilled water.
🪴 Potting Mix & Fertilizing: The plant prefers moist, well-draining soil. You can amend standard potting mix with perlite or coarse sand to improve drainage. Areca Palms are heavy feeders, so compost should be added every three months. Fertilize with a balanced liquid fertilizer during the growing season (spring and summer). Fertilizing should be avoided during the dormancy period in winters.
🌡️ Temperature & Humidity: Areca Palms do not thrive in cold temperatures; the ideal range is between 20°C to 35°C (68°F to 95°F). They appreciate high humidity, mimicking their natural tropical environment. If your indoor air is dry, especially in winter, consider misting regularly or placing the plant near a humidifier. Protect them from cold drafts.
✂️ Pruning: It’s important to prune browning leaves to maintain the plant’s appearance and health. Small browning fronds can often be ripped away easily at the base if fully dead, or cut cleanly with sharp, sanitized scissors. For larger browning leaves, cut them off close to the main stem.
🌱 Propagation: Spring is the best time for propagation. The most effective method is to separate “babies” (offsets or suckers) from a pot full of the plant when roots are visible on the offset. After propagation, water the newly potted plant once every 24 hours for a short period to help it establish, and keep it away from direct sunlight during this recovery phase.
🪴 Planter Size & Repotting: Areca Palms do well in smaller pots and do not need very large planters. Repotting is necessary about once a year if roots are coming out of the drainage holes or the plant appears root-bound. However, avoid going directly to a much larger pot, as this can lead to too much soil retaining excess moisture and increasing the risk of root rot. Go up only one pot size at a time.
💰 Investment Tip: Investing in a small Areca Palm is recommended as taller ones are expensive, and you can let it grow to your desired size over time.
🍂 Brown Tips on Leaves (Both Older & Newer):
Signs: Brown tips on both older and newer leaves, which may appear water-soaked.
Cause: This is a classic sign of overwatering. The plant struggles to evaporate excessive water, leading to burst leaf cells. If left untreated, the root system can rot.
Solution: Immediately stop watering. Move the plant to a bright, well-ventilated area to dry the soil. Once about 80% of the soil is dry, water lightly. For severe cases with suspected root rot, gently remove the plant, trim rotted (mushy, black, foul-smelling) roots, and repot with fresh, well-draining soil, watering minimally afterwards.
Another Cause: Also can be caused by hard water or fluoride in tap water.
Solution: Use filtered, distilled, or rainwater if possible.
🍂 Browning Older Leaves / Yellowing Lower Leaves / Wilting:
Signs: Browning on older or semi-older leaf tips and margins. Lower leaves may turn yellow and fall off. The plant can look wilted with older leaves browning and drying out. Prolonged issues can lead to shrinking of the base and stems.
Cause: These are strong indicators of underwatering.
Solution: Improve your watering schedule. Areca Palms prefer to dry out somewhat between waterings; water thoroughly when 50-60% of the soil feels dry. During their summer growing period, they prefer consistent moisture. In winter (dormancy), reduce watering. Always check the top 2-3 inches of surface soil moisture before watering.
🦠 Root Rot:
Signs: Plant wilts even if the soil is moist. Roots appear mushy, black, or smell foul. Often accompanied by brown, water-soaked leaf tips or overall decline.
Cause: Primarily prolonged overwatering and poor drainage.
Solution: See the detailed solution under “Overwatering” above. This includes drying out the soil, potentially using a diluted fungicide solution, and for severe cases, trimming rotted roots and repotting.
🌿 Stunted Growth / General Stress:
Signs: Plant not growing, overall unhealthy appearance.
Cause: Can be a general sign of various issues like soil compactness, lack of nutrients, or improper light/watering routines.
Solution: Loosen compact topsoil to improve watering and aeration. Ensure regular fertilization during the growing season. Review and adjust your watering and light according to the main care tips.
🟤 Leaf Spots / Red Dots (Disease):
Signs: Unusual spots or red dots appearing on the foliage.
Cause: Can indicate fungal attacks or other bacterial diseases, often exacerbated by stress (e.g., too much direct sun, improper watering) or poor air circulation.
Solution: For fungal attacks, apply a fungicide every one to two months. For bacterial diseases, it may require removing the affected part of the plant immediately. Ensure good air circulation by not placing plants too close together.
🐛 Pests (Aphids, Mealybugs, Mites, Whiteflies):
Signs: Visible insects, sticky residue on leaves, distorted new growth, or fine webbing (mites).
Solution: Deal with pests using strong water pressure to dislodge them (especially for aphids) or apply neem oil spray. Regular inspection helps catch infestations early.
By understanding these signs and adjusting your care routine accordingly, your Areca Palm will thrive and bring lush, tropical beauty to your home!
The Maranta plant, often called the Prayer Plant, is a captivating houseplant famous for its beautifully patterned leaves that fold upwards at night, resembling hands in prayer. Despite its intricate appearance, Marantas are generally considered easier to care for than Calatheas, making them a rewarding choice for plant enthusiasts, especially those who tend to overwater rather than underwater their plants.
☀️ Sunlight: Marantas can tolerate low light conditions, but they truly flourish in medium to high indirect light, which results in larger, more vibrant leaves and enhanced variegation. A spot near a north or east-facing window is often ideal. Variegated Marantas should preferably be kept in natural sunlight (indirect) to avoid potential changes in their variegation that can sometimes occur under artificial grow lights. Avoid direct sunlight, as it can scorch their delicate leaves and cause fading.
💧 Water: It is crucial not to let Maranta plants dry out, as this quickly leads to crispy edges and curling leaves. The video advises watering before the plant shows signs of dehydration. The soil should be consistently moist but never soggy. You can check the top inch or two of soil; if it feels slightly dry, it’s time to water. Ensure good drainage from the pot.
🪴 Potting Mix: A light and airy soil mix is ideal for Marantas. This type of mix allows for good drainage to prevent root rot while still retaining the necessary moisture. Adding perlite, orchid bark, or coco coir to a standard potting mix can achieve this balance.
🌱 Fertilizer: During their active growing season (spring through summer), feed your Maranta plant with a balanced liquid fertilizer diluted to half strength every 2-4 weeks. Reduce or cease fertilization during the cooler, dormant months of autumn and winter. Over-fertilizing can lead to salt buildup in the soil, which can harm the roots and cause leaf tip burn.
🌡️ Temperature & Humidity: Marantas thrive in average to warm room temperatures, ideally between 18°C−27°C (65°F−80°F). They are sensitive to cold and sudden temperature changes. High humidity environments are crucial for Maranta plants. A bathroom can be a good location if sufficient indirect sunlight is available. For drier areas, humidifiers are highly recommended. Grouping plants together or placing the pot on a pebble tray with water (ensuring the pot isn’t sitting in the water) can also help increase local humidity.
🐛 Possible Pests & Control: Spider mites are the most common pest that affects Maranta plants, often appearing when the plant is stressed by low humidity.
🌸 Flowering: Healthy Maranta plants may produce small, non-showy pink, purplish, or white flowers, typically in the springtime. While not the main attraction, these indicate a happy plant.
✂️ Pruning: Prune your Maranta to maintain its shape or encourage bushier growth. You can trim back leggy stems or remove any yellowing or dead leaves at their base using clean, sharp scissors.
🌱 Propagation: Marantas are easily propagated. The best method is by cutting below a node (the point where a leaf or new growth emerges) and rooting the cutting in water for several weeks before transferring it to soil. When transplanting a rooted cutting to soil, it’s important to keep the soil consistently moist to help the new plant establish.
🪴 Potting & Repotting: Ceramic or plastic pots are recommended to help keep the soil consistently moist, as they retain moisture better than porous terracotta pots, which would require more frequent watering. Repot your Maranta every 1-2 years or when it becomes root-bound, moving it into a pot that is only slightly larger.
⚠️ Toxicity: Marantas are non-toxic to humans and pets, making them a safe choice for homes with children and animals.
🍂 Crispy Tips / Brown Edges:
Cause: This is a very common issue for Marantas and is usually caused by:
Low humidity: The most frequent culprit.
Underwatering: Allowing the soil to dry out too much between waterings.
Non-distilled/filtered water: Sensitivity to minerals (like chlorine or fluoride) in tap water.
Solution:
Increase humidity around the plant (humidifier, pebble tray, grouping plants).
Adjust watering to keep the soil consistently moist but not soggy.
Consider using filtered, distilled, or rainwater.
Trim off crispy brown edges with clean scissors to improve appearance (they won’t turn green again).
🌿 Curled Leaves:
Cause: Chronic underwatering is the primary reason for leaves curling inwards. The plant is trying to conserve moisture.
Solution: Improve your watering routine immediately. Water thoroughly when the top 1-2 inches of soil feel slightly dry, ensuring consistency.
𓇢𓆸 Fading Color / Lighter Leaves:
Cause:
Too much direct sunlight: Intense light can bleach the vibrant patterns and cause colors to fade.
Spider mite infestation: Pests can damage leaves, leading to discoloration and dullness.
Nutrient deficiency: Lack of adequate nutrients can cause the leaves to lose their vibrancy.
Solution:
Move the plant to a location with medium to high indirect light.
Inspect for spider mites (tiny dots, fine webbing) and treat if present.
Ensure consistent fertilization during the growing season.
💛 Yellowing Leaves / Mushy Stems:
Cause: These are classic signs of overwatering and potential root rot. The roots are suffocating from too much moisture.
Solution: Immediately reduce watering frequency. Allow the topsoil to dry out more between waterings. Ensure the pot has excellent drainage. If root rot is suspected (mushy, smelly roots), unpot, trim affected roots, and repot in fresh, well-draining soil.
🕷️ Pests (Spider Mites):
Signs: Small dots on leaves, fine webbing, dull appearance, fading color.
Cause: Often appear when the plant is stressed, particularly by low humidity.
Solution: Maintain high humidity and consistent watering to deter them. Regularly shower the plant to remove dust and pests. For infestations, use horticultural oil (like neem oil) or insecticidal soap, following product instructions.
By understanding these unique needs and responding to its signals, your Maranta plant will thrive, delighting you with its vibrant foliage and charming “prayer” movements!